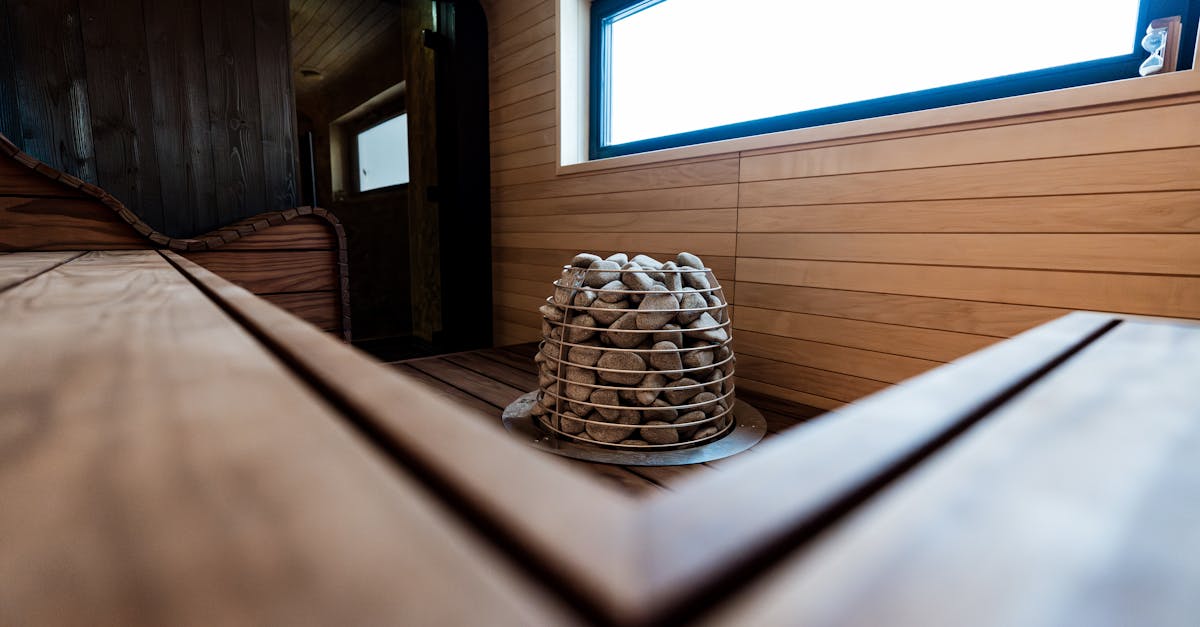
Why Your DIY Home Sauna Feels Flimsy (And What Actually Works for Lasting Comfort)
Building your own home sauna sounds like a dream, doesn’t it? The promise of endless relaxation, detox, and personal wellness, all within arm’s reach. I’ve been there. I poured over forum posts, watched countless YouTube videos, and spent weeks planning my ‘perfect’ DIY sanctuary. My vision was a solid, cozy haven of heat and steam. But when I finally stepped into my almost-finished project, the reality hit me: it felt… flimsy. The walls weren’t as robust as I’d imagined, the bench wobbled slightly, and the whole thing seemed to sigh with every movement. It wasn’t the sturdy, lasting escape I’d envisioned. It was disheartening, to say the least.
This isn’t an uncommon problem. Many DIY enthusiasts, myself included, focus heavily on the heating element or the aesthetic cedar planks, only to overlook the foundational elements that truly make a sauna feel substantial, safe, and luxurious. A flimsy sauna isn’t just about poor aesthetics; it’s a safety concern, a heat retention nightmare, and ultimately, a missed opportunity for true relaxation. The mistake I see most often is cutting corners on the unseen structural components, thinking a few extra screws or thinner lumber won’t make a difference. What changed everything for me was a radical shift in how I approached the bones of the build, not just the skin.
Key Takeaways
- Prioritize a robust, self-supporting frame using at least 2x4 lumber, preferably 2x6 for exterior walls, to ensure structural integrity.
- Invest in high-quality, dense insulation like mineral wool or rigid foam board to prevent heat loss and ensure a solid wall feel.
- Design and build benches with thick, reinforced lumber and ample support posts to eliminate wobble and ensure safety.
- Select heavier gauge, solid core lumber for paneling and ensure proper fastening techniques for a substantial, non-flexing interior.
The Fatal Flaw: Underbuilt Framing is a Foundation for Failure
When I first embarked on my sauna project, I was convinced I could save a few bucks by using lighter 2x3 framing for some internal sections and being a bit sparse with my stud spacing. After all, it’s just a small room, right? Wrong. This was the single biggest reason my first attempt felt so insubstantial. A sauna isn’t just a closet; it’s a high-heat, high-humidity environment that undergoes significant thermal expansion and contraction. A weak frame will flex, creak, and eventually lead to cracks in your paneling or issues with door alignment.
What actually works is overbuilding your frame. Think of it like building a small house, not a shed. I now advocate for a minimum of 2x4 lumber for all internal walls, and if you’re building a standalone outdoor sauna or an extension, 2x6 for exterior walls is non-negotiable. This provides crucial rigidity and allows for thicker insulation. More importantly, don’t skimp on stud spacing. I stick to 16 inches on center, even if local codes might allow 24 inches for a small structure. This creates a dense, robust framework that can handle the weight of insulation, paneling, and the constant thermal stress without complaint. Use good quality, kiln-dried lumber to minimize warping, and ensure all connections are made with appropriate structural screws, not just nails. When you push on a well-framed sauna wall, it shouldn’t give an inch. This solid framework is the silent hero that provides the ‘built-like-a-tank’ feeling you’re aiming for.
The Illusion of Insulation: Why Thin Layers Lead to a Hollow Feel
Many DIYers, in an effort to save space or cost, opt for thinner, less dense insulation. I certainly did, grabbing some readily available fiberglass batts and squeezing them into my undersized walls. While technically insulating, the low density and thin profile contributed significantly to that ‘flimsy’ sensation. When you tap on a wall, a hollow sound or slight give indicates insufficient mass and poor acoustic dampening, instantly cheapening the feel of the entire structure. Moreover, thin insulation means your heater works harder, your energy bills are higher, and the sauna struggles to maintain a consistent, intense heat.
What changed my approach was understanding that insulation isn’t just about R-value; it’s also about mass and density. I now exclusively use mineral wool batts or rigid foam insulation (like polyiso or XPS) for my sauna walls and ceiling. Mineral wool, in particular, offers excellent thermal properties, is fire-resistant, and significantly denser than fiberglass. This density not only provides superior heat retention but also adds mass to the walls, making them feel incredibly solid to the touch and sound, effectively dampening echoes and external noise. For a standard 2x4 wall, I aim for at least R-13 to R-15, and for 2x6 walls, R-19 or R-21. Ensuring every cavity is completely filled, with no gaps or compression, is critical. This denser, thicker insulation transforms a hollow-sounding wall into one that feels substantial and premium, both acoustically and thermally.
Bench Basics: The Overlooked Key to Stability and Comfort
The sauna benches are where you spend most of your time, yet they’re often an afterthought in DIY builds. My first sauna had benches that, while functional, sagged slightly under weight and wobbled disconcertingly when I shifted. This instantly eroded any sense of comfort or security. A flimsy bench makes you tense up, negating the very purpose of a sauna. It’s a critical point of contact that directly impacts the user experience and long-term durability.
What I’ve learned is that sauna benches demand structural integrity equal to, if not exceeding, the walls. I now build my benches using at least 2x4s for the frame and supports, with solid 1x4 or 1x6 cedar for the seating planks. The crucial detail is to provide ample vertical support. Instead of just a few corner braces, I install robust upright posts, often 2x4s, every 2-3 feet along the length of the bench, securely fastened to both the floor and the wall studs. For longer benches, I add a central leg assembly. The seating planks themselves should be thick enough not to flex and spaced narrowly to prevent limbs from slipping through. Using marine-grade stainless steel screws for assembly prevents rust and ensures lasting strength in the humid environment. When your bench feels like it’s carved from a single piece of wood, you instantly elevate the entire sauna experience from ‘DIY’ to ‘professional-grade’—a truly solid, safe, and comfortable place to relax.
The Paneling Pitfall: Thin Materials and Poor Fastening Undermine Durability
The interior paneling is what you see and touch most often, yet many DIY sauna builders make choices here that contribute to a flimsy feel. Thin tongue-and-groove cedar, improperly installed, can cup, warp, or even crack over time, leading to gaps and an overall sensation of poor craftsmanship. The flex when you lean against it, or the sound of it creaking, undermines the very quality you’re trying to achieve. Using low-quality or knotty wood further exacerbates this, as knots can loosen or fall out in high heat.
What actually works is prioritizing high-quality, dense lumber and meticulous fastening. I now insist on selecting solid, clear-grade cedar or aspen (minimum 1x4 or 1x6) with a substantial tongue and groove profile. This thicker material has more inherent stability and thermal mass. The key to preventing movement and ensuring a solid feel is proper fastening. I use stainless steel nails or screws, pre-drilling pilot holes when necessary to prevent splitting. Hidden fasteners are ideal, driving through the tongue at an angle, so the next board covers the head. However, for maximum security and minimal movement, I often add a small, discreet finish nail through the face of each board, especially around benches and lower sections, countersinking and filling the holes. This extra step ensures the paneling remains rigidly in place, preventing any flex or movement when touched or leaned upon. The dense, well-secured paneling is the final touch that makes the sauna feel truly substantial and built to last.
Frequently Asked Questions
Q: Can I use regular drywall or plywood for my sauna walls before paneling?
A: No, absolutely not. Regular drywall contains gypsum, which degrades rapidly in high heat and humidity, releasing sulfurous odors. Plywood, unless specifically rated for high heat and moisture (like marine-grade, which is expensive and often unnecessary), will delaminate, warp, and release VOCs. Always use cement board or a specialized foil vapor barrier over your insulation and framing, then finish with appropriate sauna-grade wood paneling (cedar, aspen, spruce).
Q: What’s the best wood for sauna benches to ensure they are sturdy and don’t splinter?
A: Clear-grade cedar is the gold standard due to its natural resistance to rot, pleasing aroma, and low thermal conductivity (it stays cooler to the touch). Aspen is another excellent choice, being splinter-free and virtually scentless. Avoid knotty woods for benches as knots can become hot and fall out over time, creating hazards and weakening the structure. Ensure planks are smooth and well-sanded.
Q: How important is a vapor barrier in preventing a flimsy-feeling sauna?
A: Extremely important! A high-quality foil vapor barrier (rated for high heat) is critical. It prevents moisture from entering your wall cavities, which can lead to mold, rot, and structural degradation over time, ultimately weakening the entire structure. It also reflects heat back into the sauna, improving efficiency. Without it, your insulation can get wet, compromising its performance and leading to a less stable, less efficient sauna.
Q: My sauna door feels light and rattles. How can I make it feel more solid?
A: A flimsy door is a common issue. Ensure your door frame is built from solid, heavy lumber (like a thick cedar frame) and securely mounted to your robust wall framing. The door itself should be solid wood or a well-insulated, tempered glass door with heavy-duty hinges that are properly screwed into the frame. Using a magnetic catch or a high-quality roller catch, combined with a weatherstripping gasket around the frame, will create a solid seal and prevent rattling. A heavier door instantly makes the whole structure feel more substantial.
Q: What type of screws should I use for sauna construction to prevent rust and ensure longevity?
A: Use stainless steel screws or nails exclusively, especially for interior components and any areas exposed to humidity. Hot-dipped galvanized fasteners can be used for framing if stainless steel is cost-prohibitive, but stainless is always preferred for critical structural connections and anywhere moisture might linger. Rusting fasteners will weaken over time and can stain your wood.
Building a home sauna that feels like a true sanctuary, not a rickety afterthought, comes down to intentional choices in its underlying construction. My early mistakes taught me that the perceived ‘flimsiness’ wasn’t just aesthetic; it was a symptom of overlooked structural integrity, inadequate insulation, and insufficient support where it mattered most. By focusing on a robust frame, dense insulation, overbuilt benches, and substantial, well-fastened paneling, you can transform your DIY project into a durable, luxurious retreat that truly stands the test of time. Don’t chase the cheapest option; invest in the bones of your build, and your body (and mind) will thank you for years to come. Start by re-evaluating your framing plans – that’s where lasting comfort truly begins.
Written by Ben Carter
DIY, home hacks, and sustainable living
With a background in community organizing, Ben is passionate about sustainable living and practical home solutions.
You Might Also Like

Why Your Homemade Gravy Is Lumpy (And What Actually Works for Silky-Smooth Perfection Every Time)
Stop making lumpy gravy! Discover why traditional methods fail and learn the simple, pro techniques for perfectly smooth, rich gravy every time.
Why Your Homemade Sauces Are Gritty, Not Smooth (And The Simple Shifts That Guarantee Silky Perfection Every Time)
Stop settling for gritty sauces. Discover the non-obvious mistakes home cooks make and the simple, professional shifts for velvety-smooth perfection.

Why Your Homemade Pie Crust Shrinks (And The Simple Shifts That Guarantee Perfect, Flaky Edges Every Time)
Stop wrestling with shrinking pie crusts! Discover the simple, often overlooked secrets to perfectly stable, flaky edges that hold their shape.