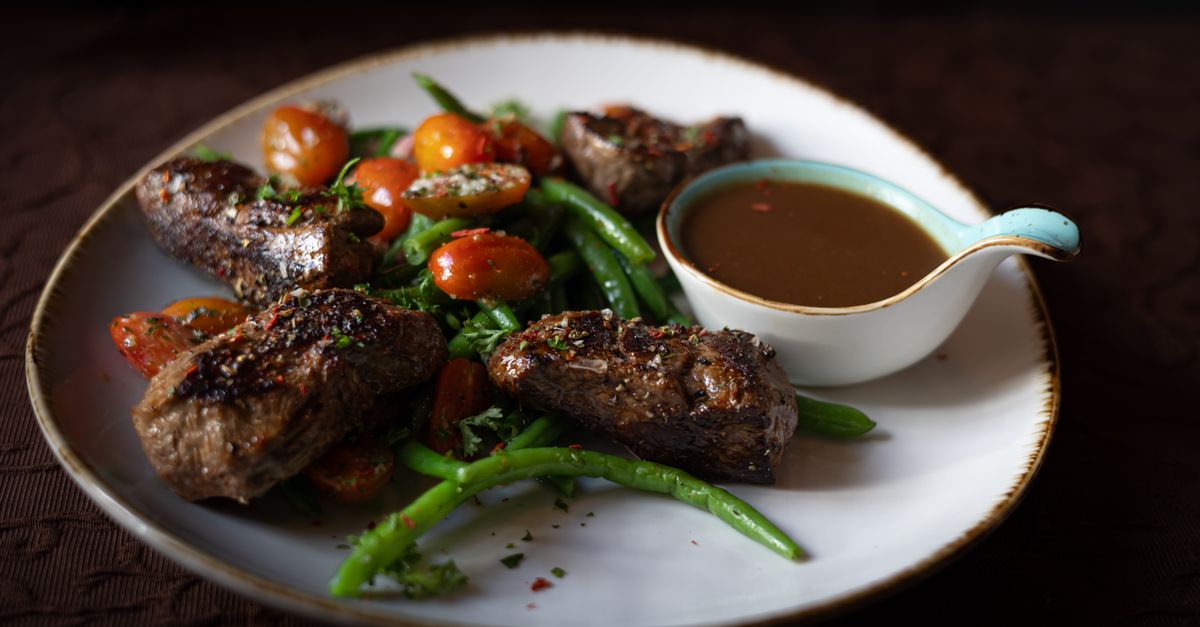
Why Your Homemade Gravy Is Lumpy (And What Actually Works for Silky-Smooth Perfection Every Time)
Every year, around the holidays, I see the same scene unfold in kitchens everywhere: the frantic whisking, the panicked addition of more flour, and finally, the resigned sigh over a bowl of gravy that, despite best efforts, looks more like textured wallpaper paste than a silken, savory sauce. If you’ve ever battled lumps in your homemade gravy, you’re not alone. For years, I struggled, too, believing it was just an unavoidable part of the homemade gravy experience.
But here’s the truth: lumpy gravy isn’t a rite of passage; it’s a symptom of fundamental misunderstandings about how flour and liquid interact. It’s not about being a bad cook. It’s about using methods that, while traditional, are often flawed and set you up for failure. What changed everything for me wasn’t some fancy chef’s trick, but a deeper understanding of the science, paired with a few simple, often overlooked techniques that guarantee a perfectly smooth, rich gravy every single time. Stop settling for gravy that disappoints. Let’s make gravy that makes you proud.
Key Takeaways
- Start with a smooth slurry, not a direct powder: Mixing flour with a small amount of cold liquid before adding it to hot pan drippings prevents lumps from forming.
- Control your heat and stir constantly: Gradual heating and continuous whisking are crucial for the even distribution and thickening of your gravy.
- Strain ruthlessly for ultimate silkiness: Even with perfect technique, a quick pass through a fine-mesh sieve guarantees a professional, lump-free finish.
- Master your roux with precision: If you prefer a roux, ensure butter and flour cook long enough to eliminate raw flour taste and achieve a homogenous paste before adding liquid.
The Fatal Flaw: Adding Dry Flour Directly to Hot Liquid
This is the cardinal sin, the number one reason most homemade gravies end up looking like a cottage cheese-infused sauce. I remember my grandmother, bless her heart, would sprinkle flour directly into the hot pan drippings, then furiously whisk. Sometimes it worked, sometimes it didn’t, and the inconsistency was maddening. The mistake I see most often, and one I made for years, is believing that a simple whisk will disperse dry flour evenly in hot, fatty liquid.
Here’s why it fails: When dry flour hits hot liquid, the outside of each flour particle immediately gelatinizes, forming a starchy, sticky coating. Before you can even begin to break them down, these coated particles clump together, trapping dry flour inside. No amount of whisking can fully dissolve these internal pockets of dry flour, leading to those persistent, annoying lumps. It’s like trying to dissolve a spoonful of powdered sugar by just dumping it into hot coffee – it just forms a hard lump at the bottom.
What actually works? The slurry method. This simple technique changed my gravy game entirely. Instead of dry flour, create a slurry by whisking your flour (or cornstarch for a glossier, gluten-free option) with a small amount of cold liquid – water, broth, or even milk – in a separate bowl until it’s perfectly smooth and lump-free. The cold liquid prevents premature gelatinization, allowing the flour to hydrate fully and evenly. Once you have this silky paste, you can then slowly whisk it into your simmering pan drippings or broth. The result? Instant, consistent smoothness without the fight.
I typically use a ratio of 1 tablespoon of flour to 2 tablespoons of cold water (or broth) for my slurry. Whisk it vigorously with a fork or a mini whisk until it’s completely uniform. This small, extra step adds maybe 30 seconds to your prep but saves you 10 minutes of frantic whisking and potential disappointment.
The Temperature Tango: Why Patience and Controlled Heat are Non-Negotiable
Even with a perfect slurry, impatient heating can undo all your hard work. Think of gravy as a delicate dance between temperature and agitation. If you dump your slurry into aggressively boiling liquid, or try to rush the thickening process over high heat, you’re inviting trouble.
In my experience, too much heat too quickly causes the starch molecules in the flour to swell and burst prematurely and unevenly. This can lead to a gravy that’s either too thick in spots and thin in others, or, worse, develops a grainy texture. The rapid change can also make it harder for the flour particles to fully disperse, contributing to lumping.
What changed everything for me was embracing a medium-low heat setting and a commitment to constant, gentle stirring. After deglazing your pan (more on that later) and bringing your liquid to a gentle simmer, slowly drizzle in your perfectly smooth flour slurry while continuously whisking. Keep whisking, gently but consistently, as the gravy slowly comes up to temperature and thickens. This ensures that the heat is distributed evenly, allowing the flour to do its job gradually and uniformly. You’ll literally feel the change in consistency as it transforms from thin liquid to a rich, glossy gravy.
This process should take 5-7 minutes. Don’t rush it. I often describe it as a meditation – a gentle, rhythmic whisking that produces magic. If the gravy gets too thick, you can always thin it slightly with a splash of warm broth or water. If it’s not thickening enough after several minutes, you can make a second, smaller slurry and slowly whisk that in, but always remember: it’s easier to add more thickener than to thin out an overly thick, lumpy gravy.
The Unsung Hero: Deglazing and Flavor Foundations
Before you even think about flour, the foundation of any truly exceptional gravy is built on proper deglazing. This step isn’t just about cleaning the pan; it’s about extracting every last bit of savory goodness from those browned bits (fond) stuck to the bottom of your roasting pan. Ignoring this step, or doing it improperly, means your gravy will lack depth, richness, and that irresistible umami punch.
I’ve seen people try to make gravy by simply adding broth to a clean saucepan, then flour. While technically a ‘gravy,’ it lacks the soul of one made from pan drippings. The fond, those little caramelized bits left after roasting meat, are concentrated flavor bombs. They’re packed with glutamates and other compounds that give gravy its characteristic savoriness. Skipping this step is like baking a cake without sugar – you’re missing a core component.
What actually works: After removing your roasted meat from the pan, place the pan over two stovetop burners on medium heat. Pour in a generous splash of liquid – wine, broth, or even water. Use a wooden spoon or a flat-edged spatula to scrape vigorously at the bottom of the pan, releasing all those flavorful browned bits. As the liquid simmers, these bits will dissolve, infusing the liquid with incredible depth. This deglazed liquid then forms the base of your gravy.
Once you’ve deglazed, you can pour this liquid into a fat separator (highly recommended for a cleaner gravy) or simply spoon off the excess fat from the top. You want some fat for flavor, but too much will make your gravy greasy. Aim for about 2-3 tablespoons of fat for every 2 cups of gravy you plan to make. This rich, deglazed liquid, now infused with the essence of your roast, is the perfect canvas for your smooth gravy.
The Ultimate Safeguard: Straining is Not Cheating
Let’s be honest. Even with meticulous technique, sometimes a rogue lump, a stray piece of herb, or a stubborn bit of fond can find its way into your otherwise perfect gravy. For years, I viewed straining as an admission of defeat, a confession that my whisking skills weren’t up to par. I was wrong. Straining isn’t a sign of failure; it’s a mark of a professional finish, a commitment to achieving absolute silkiness.
My mother used to serve gravy with little bits of everything in it – sometimes a herb stem, sometimes a tiny flour clump. While it tasted fine, it lacked that luxurious mouthfeel. What changed everything for me was realizing that every high-end restaurant, every professional chef, strains their sauces. It’s not about covering up mistakes; it’s about refining and elevating the final product.
What actually works: Once your gravy has thickened to your desired consistency, simply pour it through a fine-mesh sieve set over a clean bowl or serving vessel. Use the back of a spoon or a flexible spatula to press any thicker bits through the sieve, ensuring all the rich liquid makes it through. Any stray lumps, herbs, or bits of fond will be caught, leaving you with a perfectly smooth, glossy, and restaurant-quality gravy. This step takes literally 15-20 seconds and makes an enormous difference in the final presentation and texture.
This is especially useful if you are using pan drippings with a lot of particulate matter, or if you prefer a perfectly uniform gravy free from any textural interruptions. It’s the final polish that transforms good gravy into truly exceptional gravy.
Rethinking the Roux: Building a Stable Foundation from Scratch
While the slurry method is my go-to for quick pan gravies, understanding and mastering a roux is essential for a broader range of sauces, and for those who prefer to build their gravy entirely from scratch. A roux, a cooked mixture of fat and flour, is the traditional thickener, but it too can lead to lumps if not handled correctly.
Many people make a roux by simply melting butter, adding flour, stirring for a minute, then immediately dumping in liquid. This often results in a pasty, raw-flour-tasting gravy with inconsistent thickness. The problem? Insufficient cooking time for the flour, and improper liquid addition.
What actually works: The key to a successful roux is patience and a keen eye for texture. Start by melting your fat (butter, pan drippings, or oil) over medium-low heat. Add an equal amount of flour (e.g., 2 tablespoons fat, 2 tablespoons flour). Whisk constantly. This initial whisking creates a smooth paste. Now, here’s the crucial part: cook it. Cook the roux, still whisking, for at least 2-3 minutes for a white roux (for cream sauces), or 5-7 minutes for a blond roux (perfect for most gravies), until it develops a nutty aroma and a slightly golden color. This cooking time eliminates the raw flour taste and ensures the starch molecules are evenly coated in fat, making them less prone to clumping.
Once your roux is cooked, you have two options for adding liquid: either cold liquid into hot roux, or hot liquid into cold roux. Never hot liquid into hot roux, as this causes immediate clumping. I prefer adding cold (or room temperature) liquid slowly into my hot roux, whisking constantly. Start with a small amount of liquid, whisk it into a thick paste, then gradually add more, whisking continuously until smooth. This gradual addition, combined with the temperature differential, ensures a silky, lump-free gravy every single time. It’s a slightly more involved method than a slurry, but when done right, a roux-based gravy offers unparalleled depth and richness.
Frequently Asked Questions
Q: Can I use cornstarch instead of flour for gravy?
A: Absolutely! Cornstarch is an excellent alternative, especially if you want a gluten-free gravy or a particularly glossy finish. The key difference is that cornstarch has twice the thickening power of flour, so you’ll use half the amount. Always make a cornstarch slurry with cold water before adding it to hot liquid, as cornstarch is even more prone to clumping than flour when added dry.
Q: My gravy is too thick. How do I thin it out?
A: If your gravy is too thick, gradually whisk in small amounts (1-2 tablespoons at a time) of warm broth, water, or even a little milk, until it reaches your desired consistency. Be sure to do this over low heat, whisking constantly to ensure it incorporates smoothly without becoming watery.
Q: My gravy is too thin. How do I thicken it without creating lumps?
A: Do not add more dry flour directly to the thin gravy. Instead, make a fresh, small slurry of flour (or cornstarch) and cold liquid in a separate bowl. Whisk it until perfectly smooth, then slowly drizzle it into your simmering gravy while whisking constantly. Allow it to cook for a few minutes to thicken, and repeat if necessary.
Q: Can I make gravy ahead of time and reheat it?
A: Yes, gravy can be made ahead and stored in the refrigerator for 3-4 days. When reheating, do so gently over low heat, whisking frequently. Gravy often thickens considerably as it cools, so you’ll likely need to thin it out with a splash of warm broth or water as it reheats to achieve the desired consistency. A quick whisk or even a pass with an immersion blender can help restore silkiness if it separates or becomes a bit lumpy upon reheating.
Q: What’s the best liquid to use for gravy?
A: The best liquid for gravy is almost always the pan drippings from your roast, deglazed with broth, wine, or even water. This forms the most flavorful base. If you don’t have pan drippings, a high-quality chicken, beef, or vegetable broth works well. For an extra layer of richness, I sometimes add a splash of heavy cream or a pat of butter at the very end.
Gravy doesn’t have to be a source of stress. By understanding these few simple principles – the power of the slurry, controlled heat, proper deglazing, and the final polish of straining – you can transform your gravy-making from a yearly struggle into a point of culinary pride. This year, serve a gravy so smooth and rich, your guests will think you hired a secret chef. Embrace these techniques, and enjoy the delicious, lump-free results.
Written by Maria Rodriguez
Time management, productivity, and consumer tips
A veteran journalist, Maria brings a keen eye for detail and a knack for finding the best deals and little-known life hacks.
You Might Also Like

Why Your Homemade Sauces Are Gritty, Not Smooth (And The Simple Shifts That Guarantee Silky Perfection Every Time)
Stop settling for gritty sauces. Discover the non-obvious mistakes home cooks make and the simple, professional shifts for velvety-smooth perfection.
Why Your Homemade Pie Crust Shrinks (And The Simple Shifts That Guarantee Perfect, Flaky Edges Every Time)
Stop wrestling with shrinking pie crusts! Discover the simple, often overlooked secrets to perfectly stable, flaky edges that hold their shape.

Why Your DIY Home Sauna Feels Flimsy (And What Actually Works for Lasting Comfort)
Stop wasting time and money on a DIY sauna that feels flimsy. Learn the crucial structural and material choices that ensure a durable, enjoyable home sauna.