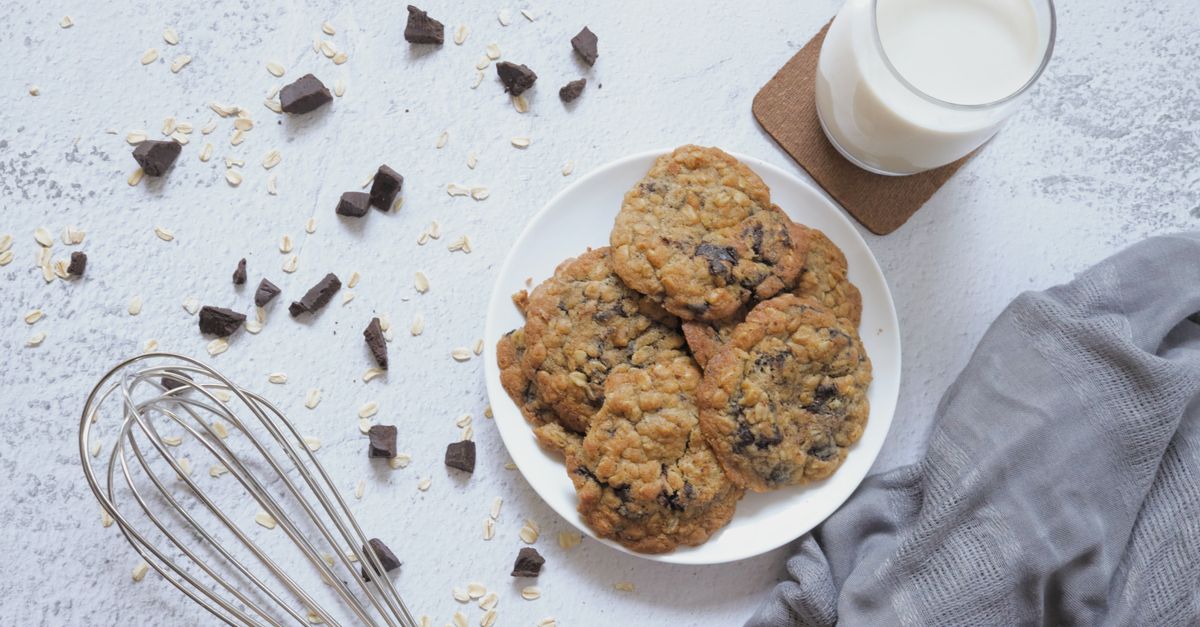
Why Your Homemade Cookies Are Flat (And The Simple Fixes That Guarantee Perfect, Puffy Results Every Time)
Do your homemade cookies often spread into thin, crispy disks instead of rising into that satisfyingly thick, chewy ideal? I’ve been there more times than I care to admit. For years, I chased that elusive bakery-style cookie, only to pull tray after tray of disappointingly flat results from my oven. It’s a common frustration, and one that makes you question every ingredient, every mixing step, and even your oven’s loyalty.
But here’s the secret: it’s rarely about a single catastrophic error. More often, it’s a combination of subtle, often overlooked factors that collectively conspire against your cookies’ loft. What I’ve learned through countless batches and a deep dive into baking science is that achieving a perfectly puffy, chewy cookie is less about magic and more about understanding how your ingredients interact and how simple adjustments can dramatically change the outcome. Stop settling for flat. Let’s get those cookies looking (and tasting) like they came straight from a gourmet bakery.
Key Takeaways
- Ensure butter is truly room temperature, not melted or too cold, for proper creaming and air incorporation.
- Chill your cookie dough for at least 30 minutes to solidify fats and prevent premature spreading in the oven.
- Use the correct flour type (all-purpose is usually best) and measure it accurately to avoid excess gluten development.
- Don’t overcrowd your baking sheets; give cookies space to spread minimally and bake evenly.
Your Butter is Lying to You: The Critical Temperature Trap
One of the biggest culprits behind flat cookies, in my experience, is butter that isn’t at the right temperature. The recipe often says “room temperature butter,” but what does that actually mean? For years, I just pulled butter from the fridge 20 minutes before baking and assumed it was good enough. Or, in a rush, I’d microwave it for a few seconds, only for it to be slightly melted around the edges. Both are recipes for disaster when it comes to cookie structure.
The Science: When you cream butter and sugar together, you’re not just mixing them; you’re incorporating air. Room temperature butter (around 67°F/19°C) is soft enough that the sugar crystals can create tiny pockets of air as the mixer beats them. These air pockets are crucial for lift during baking. Think of them as miniature balloons inflating your cookie. If your butter is too cold, it’s too hard to trap air effectively, leading to a dense dough. If it’s even slightly melted, those air pockets collapse, and you lose all that precious lift, resulting in a greasy, flat cookie.
What Actually Works: Plan ahead. Pull your butter from the fridge at least an hour, sometimes two, before you start baking. To test if it’s truly ready, gently press it with your finger. It should leave a slight indentation without your finger sinking all the way through or feeling greasy. If you’re in a pinch, cut the butter into smaller pieces (about 1-inch cubes) and let them sit for 15-20 minutes. Avoid the microwave entirely. If it’s still too cold, a trick I often use is to fill a glass with hot water, let it sit for a minute, then pour out the water and invert the warm glass over the stick of butter for a few minutes. This gently warms the outside without melting the core.
The Forgotten Chill: Why Dough Needs a Nap
This is the step that most home bakers, myself included for a long time, are tempted to skip. You’ve mixed the dough, the oven is preheating, and the aroma of raw cookie dough is calling your name. Who wants to wait another 30 minutes to an hour? But trust me, chilling your dough is non-negotiable for puffy cookies.
The Science: Chilling cookie dough does two critical things. First, it solidifies the fats in the butter. When cold butter hits a hot oven, it takes longer to melt. This extended melting time allows the cookie’s structure to set before the butter spreads too much, helping it hold its shape and height. Second, chilling allows the flour to fully hydrate. This creates a more cohesive, less sticky dough that’s easier to handle and prevents excessive spreading. It also gives the flavors a chance to meld and deepen, resulting in a more complex, delicious cookie.
What Actually Works: After mixing, gently form your dough into a disk or log, wrap it tightly in plastic, and refrigerate for at least 30 minutes. For truly spectacular results, an hour or even overnight can make a significant difference. I often make a double batch of dough, bake half, and save the other half in the fridge for a fresh batch a day or two later. When you’re ready to bake, scoop the dough directly from the fridge onto your baking sheet. Don’t let it come back to room temperature—the colder, the better for that initial bake.
Your Flour is a Fickle Friend: The Gluten and Measure Misconceptions
Flour might seem straightforward, but it plays a crucial role in the texture and rise of your cookies. Using the wrong type, or worse, measuring it incorrectly, can lead directly to flat, dense results. My biggest mistake used to be scooping flour directly from the bag with my measuring cup, compacting it significantly.
The Science: Flour provides the structural backbone of your cookie through its gluten content. All-purpose flour is generally ideal for most cookie recipes because it strikes a good balance—enough gluten for structure, but not so much that it makes the cookie tough. Too little flour, and your dough will be too wet, spreading excessively. Too much flour, and your cookies will be dense and cakey, lacking that desirable chew. Beyond quantity, how you measure flour is paramount. Compacting flour by scooping directly can add up to 25% more flour than the recipe intends, throwing off the delicate balance of wet and dry ingredients.
What Actually Works: Always use the spoon and level method. Fluff up the flour in its container with a spoon or fork. Then, gently spoon the flour into your dry measuring cup until it overflows slightly. Use the straight edge of a knife or an offset spatula to level off the excess, being careful not to pack it down. For ultimate precision, especially with sensitive recipes, use a kitchen scale to measure flour by weight (grams are most accurate). Most recipes will specify weight if it’s critical, but even with volumetric measurements, the spoon and level method is a game-changer. Also, double-check your recipe’s flour type. Cake flour has less gluten and can lead to a softer, more delicate (and potentially flatter) cookie, while bread flour has higher gluten and can make cookies tougher.
The Overcrowding Catastrophe: Give Your Cookies Space
It’s tempting to squeeze as many cookie dough balls as possible onto a single baking sheet, especially when you’re baking for a crowd or just want to finish quickly. But this seemingly innocuous habit is silently sabotaging your cookies’ ability to rise and puff.
The Science: Cookies spread as they bake, and if they’re too close together, they’ll literally run into each other, hindering proper heat circulation. This leads to uneven baking, with some areas being undercooked and others overcooked. More importantly, when a baking sheet is overcrowded, it significantly lowers the overall temperature of the oven (especially if it’s a thin sheet), causing the cookies to bake slower and spread more before their structure sets. The steam released from the cookies also gets trapped, affecting browning and texture.
What Actually Works: Give your cookies ample space. As a general rule, place dough balls at least 2 inches apart on the baking sheet. This usually means no more than 6-9 cookies per standard half-sheet pan. If you have multiple sheets, bake them one at a time on the middle rack. If your oven has very even heat distribution, you might get away with two sheets, rotating them halfway through, but for consistent puffiness, a single sheet is often best. Use parchment paper or silicone baking mats to prevent sticking and ensure even heat transfer, which also helps with uniform browning and lift.
Old Baking Soda and Powder: The Silent Saboteurs
Leavening agents are the unsung heroes of puffy cookies. Baking soda and baking powder are responsible for creating those airy bubbles that give your cookies their rise. If these ingredients are old or inactive, your cookies will, quite literally, fall flat.
The Science: Baking soda needs an acid (like brown sugar, buttermilk, or cocoa powder) to react and produce carbon dioxide gas. Baking powder is a combination of baking soda, an acid, and cornstarch, and is often double-acting, meaning it reacts once with liquid and again with heat. Over time, these chemicals lose their potency. An opened container of baking soda or baking powder will gradually absorb moisture from the air, diminishing its ability to react. If they can’t produce gas, your cookies won’t rise.
What Actually Works: Always check the expiration date on your baking soda and baking powder. Even within the date, if they’ve been open for a while, their effectiveness can decrease. To test baking soda: mix a teaspoon with a tablespoon of vinegar. It should fizz vigorously. To test baking powder: mix a teaspoon with a tablespoon of hot water. It should also fizz. If you don’t get a strong reaction, it’s time to buy a new box. Store them in airtight containers in a cool, dark pantry to maximize their shelf life.
Oven Temperature Lies: Calibrate for Cookie Success
Your oven is a foundational tool in baking, and if it’s not heating accurately, all your meticulous ingredient prep can go to waste. A common problem is an oven that runs too hot or too cold, or has hot spots that lead to uneven baking and, yes, flat cookies.
The Science: If your oven is too cool, the butter in your cookie dough will melt and spread before the flour and eggs have a chance to set the cookie’s structure, resulting in thin, flat cookies. If it’s too hot, the outside of the cookie might set too quickly, preventing even spread and resulting in a dense, possibly burned exterior with a raw interior. The ideal oven temperature ensures the fats melt and the leavening agents activate at a rate that allows for optimal rise and spread.
What Actually Works: Invest in an inexpensive oven thermometer and keep it inside your oven. You’ll be surprised how often an oven is off by 25-50 degrees Fahrenheit. If your oven consistently runs hot or cold, you can adjust the temperature in your recipes (e.g., if it runs 25 degrees cold, set it 25 degrees higher). For hot spots, you might need to rotate your baking sheets halfway through the baking time. Also, avoid opening the oven door too frequently, as this causes significant temperature fluctuations. Every time you peek, the oven loses heat, affecting the bake and potentially leading to flatter cookies. Resist the urge until at least two-thirds of the way through the baking time.
Frequently Asked Questions
Q: Can using softened butter that’s slightly melted lead to flat cookies?
A: Absolutely, yes. Slightly melted butter means the crucial air pockets you create when creaming butter and sugar together have collapsed. These air pockets are essential for the cookie’s rise and structure. If your butter is too soft or greasy, it won’t trap enough air, leading to excessive spreading and a flat, dense cookie. Aim for truly room-temperature butter that yields a slight indentation when pressed, not a greasy smear.
Q: My recipe doesn’t call for chilling the dough. Should I still do it?
A: While some recipes are formulated to work without chilling, it’s almost always a good idea for any drop cookie where you want a thicker, chewier texture. Chilling solidifies the butter, which prevents cookies from spreading too quickly in the hot oven, allowing their structure to set. It also hydrates the flour, leading to a more flavorful and manageable dough. Even 30 minutes in the fridge can make a noticeable difference in preventing flat cookies.
Q: Does the type of baking sheet affect how flat my cookies are?
A: Yes, it can. Dark metal baking sheets absorb more heat and can cause the bottoms of your cookies to set faster and potentially spread more before the top has a chance to rise, sometimes leading to flatter results or burnt bottoms. Lighter-colored, heavy-gauge aluminum baking sheets tend to reflect heat more evenly, promoting a more consistent bake and better rise. Always use parchment paper or silicone baking mats regardless of the sheet type for even baking and easy removal.
Q: I used too much sugar. Will this make my cookies flat?
A: Yes, absolutely. Sugar, especially granulated sugar, melts during baking. If there’s an excessive amount of sugar relative to the flour and fat, it will cause the cookies to spread out more as the sugar melts and caramelizes, leading to a thinner, crispier cookie. It also competes with the flour for moisture, affecting the dough’s structure. Always measure sugar accurately, and be mindful that variations in sugar types (e.g., more brown sugar versus granulated) can also impact spread and chewiness.
Q: Why do my cookies still spread even after I’ve chilled the dough?
A: Even with chilled dough, several factors could still contribute to spreading. Your oven might be too cool (use an oven thermometer!), your baking soda or powder might be old and inactive, or you might be overcrowding the baking sheet. Additionally, if your dough was initially too warm or the butter was too soft before chilling, it might not fully re-solidify enough. Ensure your baking sheets are cool before placing new dough on them, as residual heat will immediately start melting the butter.
The Path to Puffy Perfection
Achieving that perfectly puffy, chewy cookie isn’t a fluke; it’s a culmination of intentional choices and a little bit of baking science. My biggest breakthrough came when I stopped viewing each step in a recipe as a mere instruction and started understanding the why behind it. From the seemingly simple act of letting butter soften, to the patient wait as dough chills, and the meticulousness of measuring flour—each detail builds towards the cookie of your dreams.
Don’t get discouraged if your next batch isn’t absolutely perfect. Baking is a journey, and every flat cookie is a lesson learned. Start by picking one or two of these tips that resonate most with your baking habits and see the difference they make. Soon, you’ll be pulling out trays of beautifully risen, golden-edged cookies that are the envy of every bake sale and family gathering. Happy baking!
Written by Maria Rodriguez
Time management, productivity, and consumer tips
A veteran journalist, Maria brings a keen eye for detail and a knack for finding the best deals and little-known life hacks.
You Might Also Like
Why Your Homemade Gravy Is Lumpy (And What Actually Works for Silky-Smooth Perfection Every Time)
Stop making lumpy gravy! Discover why traditional methods fail and learn the simple, pro techniques for perfectly smooth, rich gravy every time.

Why Your Homemade Sauces Are Gritty, Not Smooth (And The Simple Shifts That Guarantee Silky Perfection Every Time)
Stop settling for gritty sauces. Discover the non-obvious mistakes home cooks make and the simple, professional shifts for velvety-smooth perfection.
Why Your Homemade Pie Crust Shrinks (And The Simple Shifts That Guarantee Perfect, Flaky Edges Every Time)
Stop wrestling with shrinking pie crusts! Discover the simple, often overlooked secrets to perfectly stable, flaky edges that hold their shape.