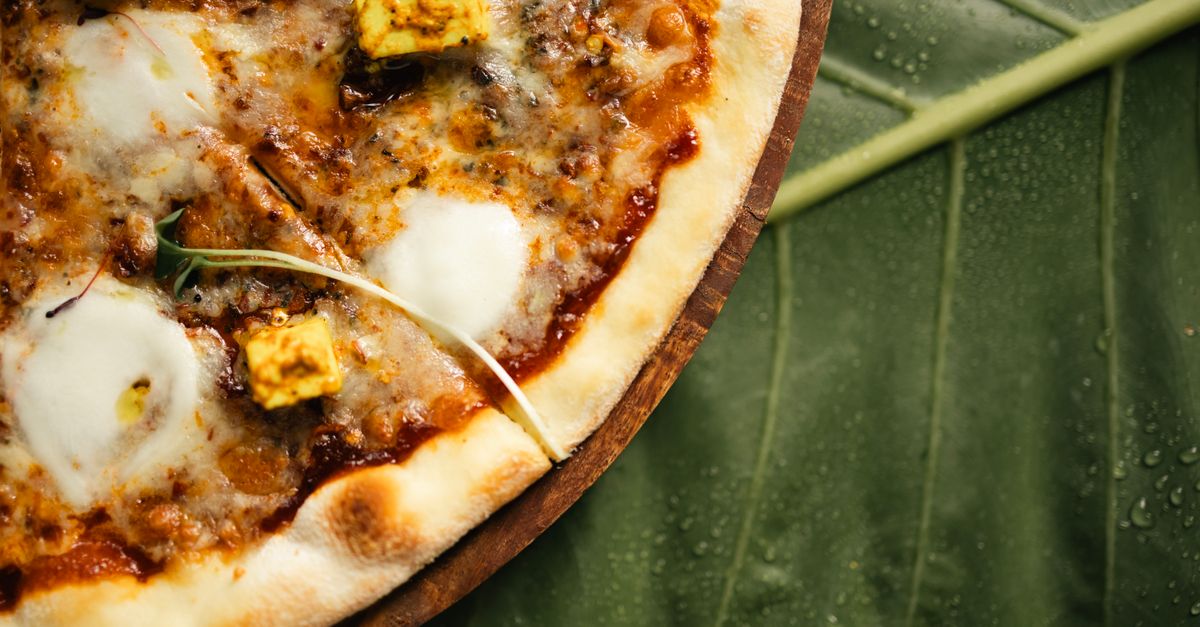
Why Your Homemade Pizza Crust Lacks Flavor (And The Simple Shifts That Deliver Pizzeria-Quality Taste)
Picture this: it’s Friday night, you’ve decided to make pizza at home. You’ve kneaded the dough, topped it with your favorite ingredients, and pulled it hot and bubbly from the oven. It looks glorious. But then you take that first bite, and while it’s pizza, something is missing. That deep, satisfying, complex flavor you get from a great pizzeria crust? It’s just… not there. It’s bland. It’s merely a vehicle for toppings, rather than a star in its own right. If this sounds familiar, you’re not alone. I’ve been there countless times, churning out perfectly edible but ultimately forgettable homemade pizza. I used to think it was about finding the ‘perfect’ flour or a secret kneading technique. What I discovered, after years of trial and error and countless mediocre pizzas, is that the secret to pizzeria-quality flavor in your homemade crust isn’t one single magical ingredient or technique. It’s a combination of often-overlooked, fundamental shifts in how you approach your dough. These aren’t complicated, but they require a shift in mindset and a little patience. In my experience, most homemade pizza crusts lack flavor because we rush the process, skimp on key ingredients, or misunderstand the science behind fermentation. What changed everything for me was embracing these subtle, yet powerful, adjustments. You don’t need a wood-fired oven or decades of experience to transform your pizza. You just need to know where to focus your efforts.
Key Takeaways
- Prioritize a long, cold fermentation (24-72 hours) to develop complex flavors in your pizza dough.
- Use good quality ingredients, especially unbleached bread flour and sea salt, for noticeable taste improvements.
- Master proper hydration, not just for texture but for optimal gluten development and flavor absorption.
- Embrace a higher heat bake with a preheated pizza steel or stone to achieve a crispy exterior and airy interior.
The Overlooked Power of Cold Fermentation (It’s Not Just About Rise)
The biggest mistake I see home pizza makers make, and one I certainly made for years, is rushing the dough’s fermentation. We follow recipes that promise ‘pizza in an hour!’ and wonder why the crust tastes flat and one-dimensional. The truth is, that quick rise only gets you volume, not flavor. For true pizzeria-quality taste, you need time.
What changed everything for me was embracing a long, cold fermentation. This means mixing your dough and then letting it slowly rise in the refrigerator for at least 24 hours, and ideally 48-72 hours. Why does this work? The cold environment slows down the yeast activity dramatically, allowing enzymes in the flour to break down complex carbohydrates into simpler sugars. This process, called saccharification, creates a wider array of flavor compounds. Think of it like aging a good wine or cheese – time develops depth.
Beyond just flavor, cold fermentation also improves the dough’s texture. The extended resting period allows the gluten strands to relax and fully develop, resulting in a more extensible dough that’s easier to stretch without tearing. This means you get a more airy, open crumb structure in your final crust, which contributes to that satisfying chew. The subtle tang you find in great sourdough or New York-style pizza? That’s the hallmark of a well-fermented dough. Don’t underestimate it. It truly transforms the crust from a mere base into an integral part of the pizza’s flavor profile. Start with at least 24 hours, and push it to 48 or even 72, and you’ll immediately notice a profound difference.
Don’t Skimp on the Salt (But Don’t Oversalt Either)
Salt is not just about making things ‘salty’; it’s a fundamental flavor enhancer that brightens and balances every other ingredient. In pizza dough, salt plays a crucial role beyond taste: it controls yeast activity and strengthens the gluten structure. The mistake I often made, and see others make, is using too little salt, or the wrong kind of salt, which results in a bland crust.
In my experience, a good pizza dough needs a solid 1.8% to 2.2% salt by weight relative to the flour. If you’re using a recipe, make sure it falls within this range. Too little, and your crust will taste flat, even with the best toppings. Too much, and it’ll be overwhelmingly salty and inhibit yeast activity, leading to a dense crust. Beyond quantity, the type of salt matters. I always recommend using a good quality fine sea salt or kosher salt. Standard iodized table salt can impart an off-flavor and doesn’t dissolve as evenly. Fine sea salt dissolves quickly and integrates beautifully into the dough, providing a clean, consistent flavor.
Consider this: when you taste a slice of pizzeria pizza, that savory depth in the crust is often attributed to proper salt balance. It brings out the subtle sweetness of the flour and the complexity developed during fermentation. It’s a simple, yet powerful, adjustment that can elevate your homemade crust from ‘okay’ to ‘outstanding.’ Always measure your salt carefully, ideally by weight for precision, and use a quality product. You’ll taste the difference.
The Hydration Sweet Spot: More Than Just ‘Wet Dough’
Hydration, or the ratio of water to flour, is one of the most critical, yet often misunderstood, elements of pizza dough. Many beginners, myself included, simply add enough water until the dough ‘comes together’ and feels manageable. This approach often results in a dough that’s too stiff, leading to a dense, chewy crust that lacks that coveted airy texture and deep flavor absorption.
In my experience, the sweet spot for a home pizza dough is usually between 60% and 70% hydration, depending on your flour. Higher hydration (more water) creates a looser, stickier dough that can be challenging to work with initially, but it’s a game-changer for flavor and texture. More water allows for better gluten development and creates a more open crumb structure, meaning the crust will have larger, irregular air pockets – a sign of a well-made pizza. These air pockets contribute to a lighter, crispier crust that is also more capable of absorbing and carrying the flavors of your toppings.
Another benefit of higher hydration is improved browning. The extra moisture in the dough creates more steam during baking, which helps the crust expand rapidly and achieve a beautiful, caramelized exterior. If your crust consistently comes out pale, try increasing your hydration slightly (start with an extra 1-2 tablespoons of water per cup of flour) and you’ll likely see a significant improvement. Don’t be afraid of a stickier dough; with practice and a little extra flour for dusting, it becomes easier to handle and the results are well worth it. It’s not just about a pretty crust; it’s about a better-tasting one.
The Secret Ingredient: High-Quality Unbleached Flour
For years, I bought whatever all-purpose flour was on sale, thinking ‘flour is flour.’ This was a fundamental misunderstanding that held back the flavor of my pizza crusts significantly. While all-purpose flour works, it often lacks the protein content and gluten-forming potential needed to develop a truly exceptional pizza crust.
What truly elevates a homemade crust is using a good quality unbleached bread flour or, even better, a ‘00’ flour if you can find it. Bread flour has a higher protein content (typically 12-14%) compared to all-purpose (10-12%). This higher protein translates directly to stronger gluten development, which is essential for that signature chewy-yet-crispy texture and an open, airy crumb. Stronger gluten also means the dough can handle higher hydration, which, as we discussed, is crucial for flavor development.
‘00’ flour, a finely milled Italian flour, is fantastic for Neapolitan-style pizza. It’s often lower in protein than American bread flour, but its unique milling process results in a very soft, extensible dough that tolerates extremely high heat, giving you a beautiful char and tenderness. Regardless of whether you go for bread flour or ‘00’, make sure it’s unbleached. Bleached flours can have an altered flavor and may interfere with yeast activity. Think of it this way: the flour is the canvas for your pizza. Investing in a better canvas means your masterpiece will look and taste significantly better. It truly is a foundational element for flavor, not just structure.
Bake Hot and Fast: The Pizzeria Method for Max Flavor
Many home bakers pull their pizza out of the oven only to find a pale, soft, or even soggy crust that lacks that satisfying char and crispness. The reason? Not enough heat. A standard home oven simply can’t replicate the intense, direct heat of a commercial pizza oven, but you can get surprisingly close with the right technique.
The critical shift I made was realizing that a home oven needs help to get hot enough, and consistently hot, to properly cook a pizza crust. This means preheating your oven to its absolute highest setting (usually 500-550°F / 260-290°C) for at least 45 minutes to an hour with a pizza steel or stone inside. A pizza steel is my personal preference – it conducts heat more efficiently and consistently than a stone, resulting in a crispier bottom crust in less time. The goal is to cook the pizza as quickly as possible, typically in 5-8 minutes. This rapid bake creates what’s known as ‘oven spring,’ causing the crust to puff up dramatically and develop those airy pockets, while simultaneously charring the exterior for complex flavor.
Placing your pizza directly onto a screaming hot surface is key. If you’re baking on a flimsy baking sheet, the bottom won’t cook fast enough, leading to a pale, doughy crust. The intense heat not only crisps the bottom but also helps to caramelize the sugars in the dough, contributing to that deep, savory-sweet flavor profile. It’s not just about cooking the pizza; it’s about blasting it with heat to unlock its full flavor potential. This high-heat method changed my pizza game entirely, delivering results that finally rivaled my favorite pizzerias.
Frequently Asked Questions
Q: Can I use instant yeast for a long, cold fermentation?
A: Absolutely! Instant yeast works perfectly for cold fermentation. Because the cold temperature slows down yeast activity, you can use a smaller amount than a quick-rise recipe would call for. For a 24-72 hour cold ferment, I typically use about 0.3% to 0.5% instant yeast by weight of flour. This small amount allows for a slow, steady rise that develops superior flavor without over-proofing.
Q: My high-hydration dough is too sticky to handle. Any tips?
A: High-hydration doughs can be tricky! The key is minimal handling and using a light dusting of flour, not incorporating it into the dough. Instead of kneading vigorously, try the ‘stretch and fold’ method in the bowl. After cold fermentation, let the dough come to room temperature for 1-2 hours. When shaping, use plenty of flour on your work surface and hands, and gently stretch the dough rather than pushing or pulling it. Avoid adding too much flour to the dough itself, as this will reduce hydration and impact texture.
Q: What’s the best way to get a crispy bottom crust in a home oven?
A: The best way is to use a preheated pizza steel or thick pizza stone. Place it on the top rack of your oven and preheat the oven to its maximum temperature (500-550°F / 260-290°C) for at least 45 minutes, ideally an hour. This ensures the steel/stone is thoroughly heated. Launch your pizza directly onto the hot surface. The intense, direct heat from the steel will cook the bottom crust rapidly, giving it that perfect crispness and char.
Q: Does sugar or olive oil help with crust flavor?
A: Yes, both can contribute! A small amount of sugar (around 1-2% of flour weight) can give the yeast a boost and aid in browning, leading to a slightly sweeter, more caramelized crust. Olive oil (around 2-5% of flour weight) adds richness and tenderness, and helps with extensibility, making the dough easier to stretch. However, neither will compensate for a lack of proper fermentation or low-quality flour. They are enhancements, not substitutes for fundamental good dough practices.
Q: How can I tell if my dough is properly fermented?
A: After cold fermentation, your dough should have increased significantly in volume (usually doubled or more), be very bubbly on the surface, and feel light and airy when you gently poke it. It should also have a distinct, slightly tangy aroma, indicating the yeast has done its work breaking down sugars. If it collapses easily or smells strongly alcoholic, it might be over-proofed. If it hasn’t expanded much, it may need more time at room temperature before shaping.
Written by Ben Carter
DIY, home hacks, and sustainable living
With a background in community organizing, Ben is passionate about sustainable living and practical home solutions.
You Might Also Like
Why Your Homemade Gravy Is Lumpy (And What Actually Works for Silky-Smooth Perfection Every Time)
Stop making lumpy gravy! Discover why traditional methods fail and learn the simple, pro techniques for perfectly smooth, rich gravy every time.

Why Your Homemade Sauces Are Gritty, Not Smooth (And The Simple Shifts That Guarantee Silky Perfection Every Time)
Stop settling for gritty sauces. Discover the non-obvious mistakes home cooks make and the simple, professional shifts for velvety-smooth perfection.
Why Your Homemade Pie Crust Shrinks (And The Simple Shifts That Guarantee Perfect, Flaky Edges Every Time)
Stop wrestling with shrinking pie crusts! Discover the simple, often overlooked secrets to perfectly stable, flaky edges that hold their shape.