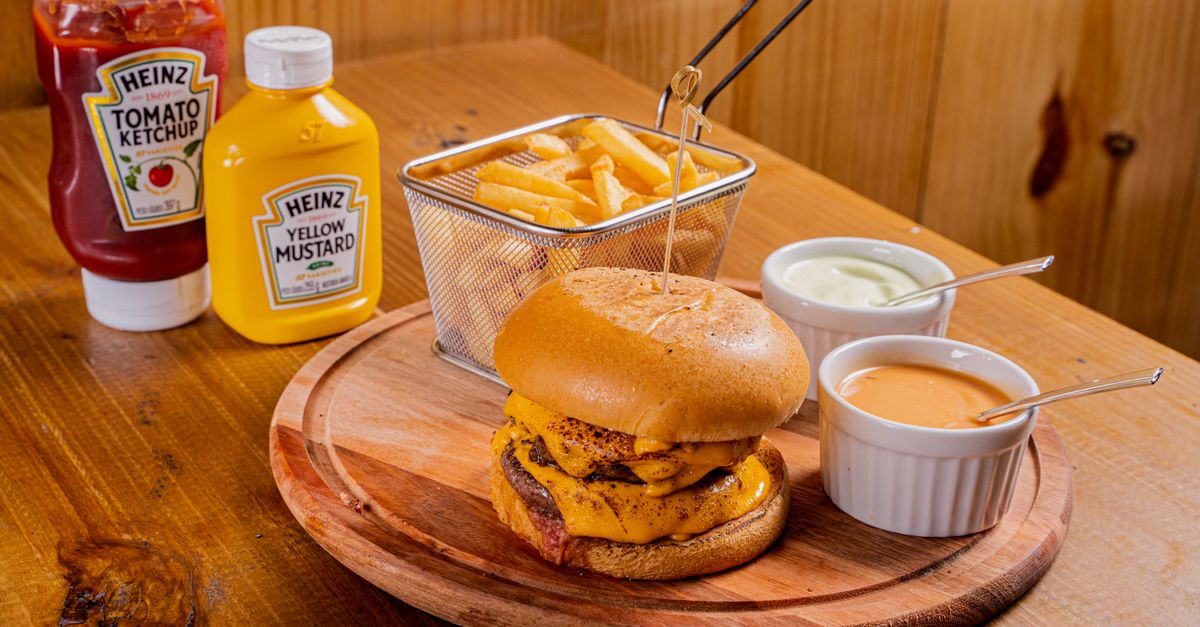
Why Your Homemade Sauces Are Greasy (And The Pro Secrets for Velvety Perfection Every Time)
You’ve just spent time carefully crafting a beautiful homemade sauce—maybe a rich tomato sauce for pasta, a creamy pan sauce for chicken, or a delicate béchamel for a gratin. You stir, you simmer, you taste… and then you see it. That tell-tale film of oil or butter sitting on top, or worse, a distinctly separated texture where the fat has broken away from the liquid. Instead of a luscious, emulsified dream, you’re left with a greasy, unappetizing mess. It’s frustrating, right? Especially when you’ve followed a recipe to the letter and expected a smooth, restaurant-quality result.
I’ve been there more times than I care to admit. For years, my sauces were either too thin, too thick, or consistently had that unwelcome sheen of separated fat. It wasn’t until I started working in a professional kitchen that I truly understood the subtle, yet critical, techniques that separate a home cook’s greasy sauce from a chef’s velvety masterpiece. It’s not about expensive ingredients or fancy equipment; it’s about understanding the science and art of emulsification, temperature control, and proper technique. These aren’t just ‘chef secrets’—they’re practical shifts you can implement in your own kitchen to transform your sauces from good to extraordinary.
Key Takeaways
- Ensure proper emulsification of fats and liquids from the start by incorporating them gradually and with consistent whisking.
- Control your cooking temperature meticulously, as overheating or rapid temperature changes are primary culprits for sauce separation.
- Choose the right thickener for your sauce and incorporate it correctly to build a stable, smooth base that resists greasiness.
- Achieve a smooth, non-greasy finish by knowing when and how to finish your sauce with butter, acid, or fresh herbs.
The Emulsification Error: Why Your Fat Isn’t Playing Nice with Liquid
When I first started cooking, I thought a sauce was just liquid, fat, and flavorings thrown together. If it tasted good, great. But texture? That was a mystery. The number one reason your sauces turn greasy, in my experience, is a failure to properly emulsify. Emulsification is simply the process of blending two immiscible liquids (like oil and water) into a smooth, stable mixture. Think mayonnaise—it’s just oil and vinegar, but it’s thick and creamy because the oil is suspended in tiny droplets throughout the vinegar.
The mistake I see most often, and one I made for years, is adding fat too quickly or in too large a quantity without sufficient agitation. Imagine a creamy tomato sauce: you start with sautéing aromatics in olive oil. Then you add tomatoes, and perhaps some cream or butter at the end. If you dump in a cold chunk of butter to a hot, simmering sauce and just give it a perfunctory stir, that butter is going to melt into a separate slick on top. It doesn’t have a chance to integrate into the water-based components of your sauce.
What changed everything for me was learning the gradual addition and constant whisking technique. If you’re adding butter to finish a pan sauce, take the pan off the direct heat. Add a small piece of cold butter, then whisk vigorously until it’s fully incorporated and the sauce visibly thickens and shines. Repeat with another small piece, whisking each time, until all the butter is added. This incremental process, often called ‘monter au beurre’ in French cooking, allows the butterfat to gradually break down into microscopic droplets, which are then dispersed throughout the sauce by the whisking action, creating a stable emulsion. The cold butter helps stabilize the sauce by bringing down the temperature slightly, preventing the emulsion from breaking.
For oil-based sauces, like some vinaigrettes or even pesto that uses oil, the principle is similar: add the oil in a slow, steady stream while continuously whisking or blending. This gives the liquid enough time and energy to encapsulate the oil droplets. Don’t rush it. A good emulsion is built patiently, not hastily poured.
The Temperature Tango: How Heat Breaks Your Beautiful Sauce
Temperature control is paramount. A lot of home cooks, myself included in my early days, treat a simmer as ‘low heat’ and a boil as ‘high heat,’ without truly understanding the nuances of how different temperatures affect sauce stability. The truth is, drastic or uncontrolled temperature changes are silent killers of a perfectly emulsified sauce, leading directly to that dreaded greasy separation.
For most delicate sauces—think hollandaise, béarnaise, or even a creamy pasta sauce where you’re adding cheese or cream at the end—high heat is the enemy. Overheating causes the proteins in dairy to curdle and the emulsified fats to separate. Proteins denature and clump, squeezing out the fat that was so carefully dispersed. This is why you often see a greasy film on top of an overcooked cheese sauce or a creamy soup that’s been boiled too hard.
What I learned to do was to think of sauce creation as a gentle dance with heat. When incorporating dairy, cheese, or enriching fats like butter or egg yolks (as in hollandaise), always reduce the heat to low, or even remove the pan from the heat entirely. Allow the ingredients to warm up gradually and integrate slowly. For example, when making a cheese sauce, adding shredded cheese to a screaming hot béchamel will almost always result in a greasy, clumpy mess. Instead, remove the béchamel from the heat, let it cool for a minute or two, then add the cheese in small handfuls, stirring until each batch is melted and smooth before adding more. The residual heat will be sufficient, and the gentler temperature prevents protein coagulation and fat separation.
Similarly, bringing a delicate cream sauce to a rolling boil after adding cream can ruin it. A gentle simmer is usually all that’s needed to thicken and meld flavors. If your sauce ever looks like it’s on the verge of breaking (you see tiny droplets of fat starting to form), immediately remove it from the heat and try whisking in a tablespoon of cold liquid (water, stock, or even more cream) or a small piece of cold butter. This shock of cold can sometimes bring the emulsion back together.
The Thickener Trap: Choosing Wrong or Using Improperly
Many sauces rely on a thickener to give them body and prevent greasiness by binding water and fat. Roux (flour and fat), beurre manié (cold butter and flour), cornstarch slurries, or even just reduction are common methods. But if you choose the wrong thickener for your specific sauce or incorporate it incorrectly, you’re setting yourself up for failure, including a greasy texture.
The most common thickener pitfall leading to greasiness is an improperly cooked roux. A roux, made by cooking flour in fat, needs to be cooked sufficiently to eliminate the raw flour taste. If you don’t cook it long enough, the sauce can taste starchy. If you cook it too long, it can lose its thickening power. But the key to preventing greasiness is ensuring the flour fully absorbs the fat before you add your liquid. If you add liquid before the flour has absorbed all the fat, the unabsorbed fat will simply sit on top, leading to a greasy sauce.
My game-changer here was realizing the importance of a 1:1 fat-to-flour ratio for roux by weight, not volume, and cooking it until it looks like a cohesive, paste-like ball, not just wet flour. Then, when adding liquid, always add cold liquid to a hot roux (or hot liquid to a cold roux) and whisk continuously to prevent lumps and ensure proper absorption. Adding hot liquid to a hot roux can cause the flour to seize up and clump, preventing even thickening and leaving pockets of fat.
For cornstarch or arrowroot slurries, the mistake is often adding them to a sauce that isn’t at a gentle simmer or not mixing the thickener thoroughly with cold water before adding. If you dump dry cornstarch into hot liquid, it will clump instantly, leaving you with an unevenly thickened, potentially greasy sauce. Always mix cornstarch with an equal amount of cold liquid until it forms a smooth paste, then slowly whisk it into your simmering sauce. Bring it back to a gentle simmer for a minute or two to allow the starch to fully hydrate and thicken without overcooking.
The Finishing Finesse: Butter, Acid, and Freshness
Even after mastering emulsification and temperature, a sauce can still look a bit… dull or slightly separated if not finished correctly. This final step is where a chef truly elevates a sauce from merely good to great, often by adding a touch of fat or acid to create that perfect sheen and balance, without adding greasiness.
Adding a final knob of cold butter at the very end, off the heat, while swirling or whisking gently is a classic technique for enriching and giving a sauce a beautiful, glossy finish. This is the ‘monter au beurre’ technique again, but specifically for finishing. The small amount of cold butter melts slowly, forming a stable emulsion that adds richness and shine without making the sauce greasy. The trick is to do it off the direct heat to prevent the butter from breaking down into pure oil. If you add butter to a rapidly boiling sauce, it will almost certainly separate.
Another secret is acid. A squeeze of lemon juice, a splash of vinegar, or a touch of wine added at the end can brighten flavors, cut through richness, and help marry the fat and liquid components of a sauce. Think about a creamy chicken dish: a final squeeze of lemon juice not only adds a burst of flavor but can also prevent the sauce from tasting overly heavy or greasy, by making the fat droplets feel less pronounced on the palate. However, too much acid or adding it too early, especially with dairy-based sauces, can cause curdling, so moderation and timing are key.
Finally, don’t underestimate the power of fresh herbs. Stirring in finely chopped fresh parsley, chives, or basil right before serving adds not only a burst of color but also a fresh, aromatic counterpoint that cleanses the palate and can make a rich sauce feel less greasy. The visual appeal also tricks the brain into perceiving a lighter, fresher dish. These are the subtle touches that elevate your sauces from functional to truly memorable.
Frequently Asked Questions
Q: My sauce has already separated and looks greasy. Can I fix it?
A: Sometimes, yes! If your sauce has just started to separate, immediately remove it from the heat. Whisk vigorously, possibly over an ice bath if it’s a warm emulsion like hollandaise, or try whisking in a tablespoon of cold water, stock, or even cream. For dairy-based sauces, a small amount of an emulsifier like Dijon mustard or a pinch of lecithin powder (if you’re adventurous) can sometimes bring it back. If it’s a tomato sauce, pureeing it with an immersion blender can often re-emulsify the fats. If the separation is severe, it might be beyond repair, but it’s always worth a shot.
Q: How do I know if my roux is cooked enough to avoid greasiness?
A: A properly cooked roux should have a consistent, paste-like texture, with no visible dry flour or excess shimmering fat. It should smell slightly nutty, not raw flour. The flour should have fully absorbed the fat, creating a smooth, homogenous mixture. For a light roux, it will still be pale yellow; for a dark roux, it will be a rich brown, but in all cases, it should be uniformly textured.
Q: Should I always use cold butter to finish a sauce?
A: Yes, for finishing a sauce, adding cold butter in small pieces off the heat is generally preferred. The cold butter melts slowly, allowing it to integrate into the sauce more effectively and create a stable emulsion. Adding cold butter also slightly lowers the sauce’s temperature, further stabilizing any delicate proteins and preventing separation. If you add warm or melted butter, it’s more likely to separate into an oily layer.
Q: My cream sauce curdles when I add acid. How can I prevent this?
A: Curdling often happens when acid is added directly to hot dairy. To prevent this, first, temper your acid: mix the acid (lemon juice, vinegar, etc.) with a small amount of the hot cream sauce in a separate bowl, then slowly stir this mixture back into the main sauce. This gradual temperature equalization helps prevent the proteins from shocking and curdling. Also, ensure your cream sauce isn’t at a rolling boil when you add any acid; a gentle simmer or removing it from the heat entirely is best.
Q: Can adding too much thickener make a sauce greasy?
A: Not directly, but it can contribute to a poor texture that feels greasy or heavy. If you use too much flour or cornstarch, the sauce can become gummy or gloopy, which can trap fats unevenly and give an unpleasant mouthfeel. An overly thick sauce also often feels heavier. The goal is just enough thickener to achieve the desired consistency, allowing the fat to be properly suspended rather than coating your palate in a thick, starchy film.
Conclusion
Crafting a velvety, non-greasy sauce might seem like a dark art, but it’s really a matter of mastering a few key principles. From gradually incorporating fats to dancing gently with your heat and understanding your thickeners, each step plays a crucial role. Don’t be discouraged by past greasy endeavors; every culinary journey has its learning curves. Armed with these insights, you’re now ready to transform your homemade sauces from frustratingly separated to truly spectacular. The next time you’re in the kitchen, remember these shifts, and prepare to impress yourself with perfectly rich, smooth, and utterly delicious results.
Written by Maria Rodriguez
Time management, productivity, and consumer tips
A veteran journalist, Maria brings a keen eye for detail and a knack for finding the best deals and little-known life hacks.
You Might Also Like
Why Your Homemade Gravy Is Lumpy (And What Actually Works for Silky-Smooth Perfection Every Time)
Stop making lumpy gravy! Discover why traditional methods fail and learn the simple, pro techniques for perfectly smooth, rich gravy every time.

Why Your Homemade Sauces Are Gritty, Not Smooth (And The Simple Shifts That Guarantee Silky Perfection Every Time)
Stop settling for gritty sauces. Discover the non-obvious mistakes home cooks make and the simple, professional shifts for velvety-smooth perfection.
Why Your Homemade Pie Crust Shrinks (And The Simple Shifts That Guarantee Perfect, Flaky Edges Every Time)
Stop wrestling with shrinking pie crusts! Discover the simple, often overlooked secrets to perfectly stable, flaky edges that hold their shape.